Focus Stacking on the Nikon Z5
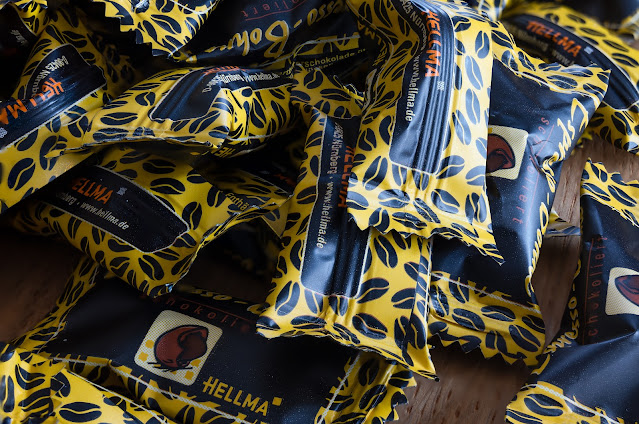 |
| Nikkor Z 50mm, Meike Ring, F6.3, 2.5sec, ISO100, 50 Images Stacked |
I tried focus stacking with a test scene. Sorry for the advertisement, but these are wonderful together with an espresso.
For the setup, I selected F6.3, ISO400 with a fairly long exposure time on a tripod due to the dim window light. It took 50 images to get sharpness from front to back. The step size was 2 in the setup of the focus stacking. The first exposure was focussed slightly in front of the scene. The last exposure did not even get the far end in focus.
The lens was the Nikkor Z 50mm together with the 18mm Meike ring. I found this poor-man-macro shooting completely satisfying. I was considering the 105mm VR macro lens because it also doubles as a beauty portrait lens. But, currently, I don't really need it. For longer macro focussing, I could also take the 24-200mm with a Meike ring if necessary. For macros, you don't really need a slow lens.
I discovered that I had to use AF and the camera refuses to stack in MF. That surprised me, and I do not understand the reason yet. After all, it should not focus anywhere, but simply increase the focus distance at each shot. I am currently investigating what happened. My solution was to select a close object in AF before going into the focus stacking menu.
Here is the first image of the scene, unprocessed.
 |
| First Image |
And here is the last one.
 |
| Last Image |
The stacking was done in Photoshop, after exporting the images as layers for Photoshop. This takes several minutes to complete. Then, all layers have to be selected, then aligned and finally stacked. That takes another few minutes. I got an error message that the process failed due to a "software problem".
However, the result was perfectly fine besides some ghosting on the wood of the table. To avoid that, others suggested to take an even higher F-stop or use a more specialized software. Of course, it is also possible to fix the problem manually after the processing in Photoshop. To do that, copy the layer with the sharp image on top, add a black mask, and paint the sharp details white into the mask.
Saving should now save the result as a TIFF file, which is automatically imported by Lightroom. Unfortunately, that did not work. Photoshop wanted to save the image in the cloud, or as PSD on my computer with all layers. So, I reduced the layers to the background, and selected "Save as" with the option to save a TIFF. I then imported this TIFF into Lightroom, developed it and exported it as JPEG. That's the image you see at the start of this posting.
By the way, below is the image that I'd have selected if this wasn't a test of focus stacking. I might even prefer that kind of shallow DOF for normal photography. For macro work, photo stacking is essential, however. Otherwise, the region of sharpness is simply too small.
 |
| Preferred Image |
Comments
Post a Comment